Monday, June 29, 2009

this weekend's cooking projects

so this weekend, s and i made three food projects in one morning. each one was so quick and easy, but i didn't actually make them all. no problem. i will talk about them all anyway, as if i had more of a hand than may be technically true.

last weekend, we made some arugula pesto--arugula, sauteed garlic, almonds, parm, salt, pepper--and discovered the total genius that is the kitchenaid food mill attachment. it makes your pesto this lovely consistency where you don't have to add much, if any, olive oil, so the flavors themselves stand out really well. it doesn't puree like a food processor tends to, and you don't have to mess with it and add lots of liquid like you do with a blender. furthermore, you can apparently get attachments with it to make pasta noodles, though i don't have those yet, which would even make it more functional.

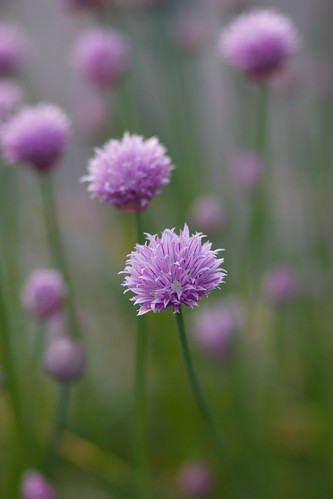
anyway, we decided to use that attachment again to make a different kind of pesto (which, with the aforementioned arugula pesto, and the garlic scape pesto my roommate m made on wednesday, makes 3 types of pesto made in one week in our house!), since when we were at the garden we noticed that there was a huge amount of communal cilantro. we picked several handfuls, and got some raw cashews from the store. sunday morning, it was pesto-making time. a few cubes of parm, a clove of elephant garlic, some overgrown chives from the garden that had gotten a little bit woody so weren't good for straight eating anymore, all into the food grinder! after everything was ground up--which, by the way, is so awesome to watch!--we mixed in a splash of the nice olive oil and a little salt, and we were done! cilantro pesto, mmmmmm.

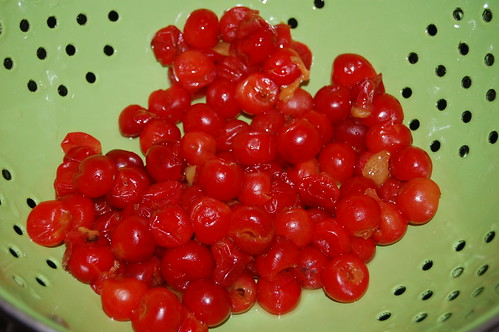
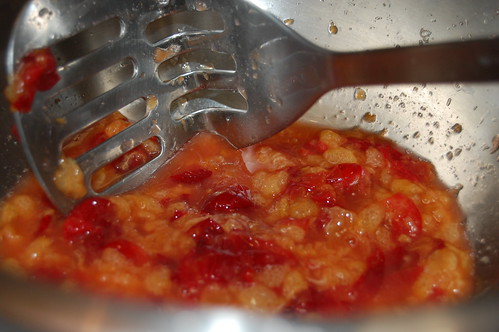
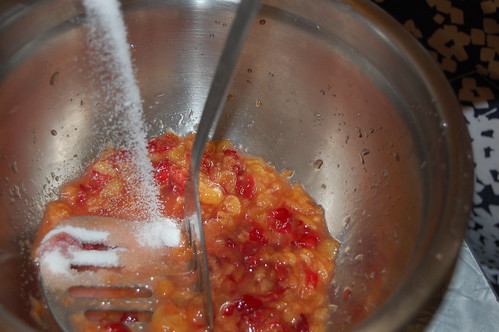
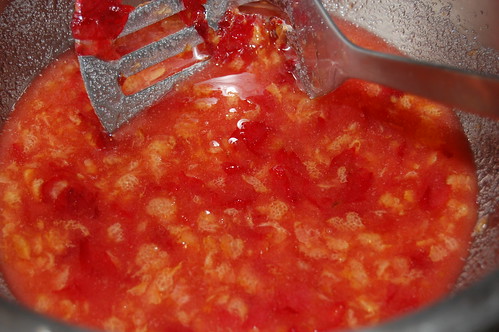
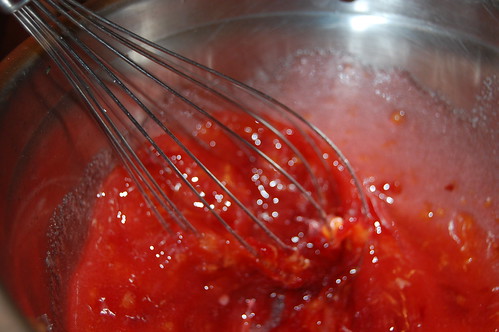
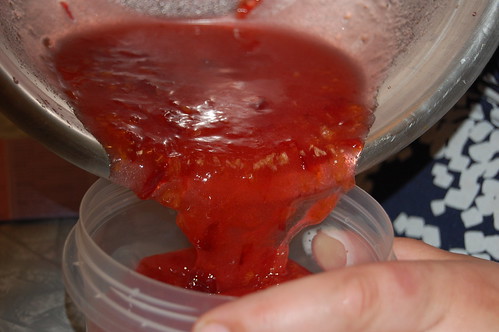
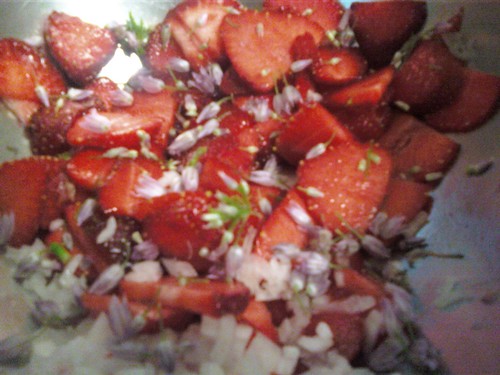
food project #2 was preserving more sour cherries. shayn pitted and washed them, then we added some sugar and let them macerate. once the sugar was dissolved, we froze them in a tub. for some reason, they didn't freeze very quickly, so last night i put some of the cherry sauce over my froyo and it was AMAZING. the longer-term plan for the cherries, if i get final say, is a white chocolate-mascarpone tart, maybe with a graham cracker crust, maybe with an almond crust. but, it's nice being able to take them out and use them at will!

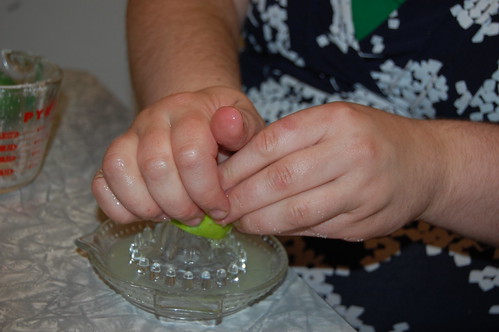
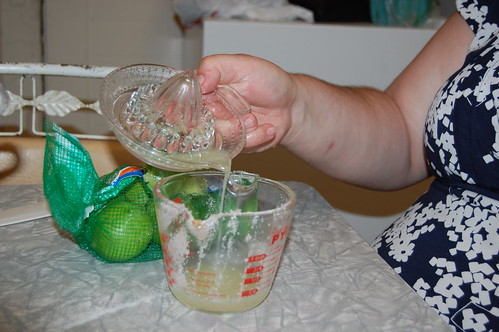
food project #3 is a result of stop #2 on waltham day on saturday, although it is technically on the watertown side of the waltham-watertown line. we went to russo's, the most amazing store on earth. it has the most incredible fruits and veggies, so much cheese, fresh pasta, a great (and not that expensive) salad bar, etc--i used to work two doors down from it and loved going there for lunch. they have a huge selection of produce at amazing prices, and one of the things we got there was a bag of key limes (probably ~15 of them?) for 88 cents. so, we decided to preserve them the way you would meyer lemons. i haven't really heard of doing this with limes. we will see what happens. but, random easy pickling project when you find nice cheap food? yes please. other purchases at russos--after getting a full bag of foods from the garden (mostly lettuce, kale, collards, kohlrabi, sage, cilantro, cherries) include the following: 3 lbs of brussel sprouts, a pkg of blueberries, 2 artichokes, 12 small hot peppers, 1.5 lbs of fava beans, and one other thing that i am currently forgetting because i know that we had 7 items, one too many for the express lane. total cost? $13.00!

last night, i made beet chips. also quick and easy. i sliced beets on the mandoline, tossed with olive oil and salt and pepper, and put in a single layer (i learned my lesson) on a baking sheet for 6-8 minutes. really, really good, and a nice way to eat a lot of beets (if, say, your csa is giving you so many of them but it seems like a funny time for beets since it is SUMMER NOT FALL and so you have to trick yrself into liking them)!

that was this week's easy projects. the photos weren't that exciting so i didn't include them. maybe i will go back later and change that.


RECOMMENDED DINNER (aka how i combined random stuff to eat last night):

  • raw kale salad (dinosaur kale, carrots, garlic scapes, chive vinegar, olive oil, salt, pepper)
  • beet chips (see above)
  • whole wheat toast that m got a huge day-old bag of from city feed, with thinly sliced cheddar cheese (i used my veg peeler) and cilantro pesto
  • vanilla frozen yogurt with cherries

(this is best accompanied by season 1 of ANTM--who knew the whole season came as one rental from the library branch only 1.5 blocks away? it's okay to be in love with elyse, right? sure, she's only 20 then, but she's closer to my age now.)

Monday, June 22, 2009

sour cherry freezer jam

at the community garden where some friends and i have a plot, they have communal fruit trees. they are magical. and right now, the sour cherry tree is heading toward ripeness.

off the tree, the sour cherries are a little bit, some might say, sour. but fixed up with a little bit of sugar and turned into preserves? MAGIC.

freezer jam is nice because you don't cook anything, so you get to retain the really fresh flavor of whatever you are preserving. with cherries straight from the tree, that's extra exciting.

you will need:

  • sour cherries (though you could do this with sweet, also, just with less sugar)

  • a lemon or lime (or at least lemon or lime juice)

  • sugar

  • fruit pectin


all photos by shayn.

first, you need to pit and wash yr cherries.


next, mash them up in a bowl and figure out how much you have once they are mashed (yes, you can use a measuring cup if you want).


if you are using sour cherries, add about twice as much sugar as you have cherries. if using sweet cherries, maybe use a 1:1 ratio and then add more to taste if needed?


mix until the well blended, then let sit for 10 minutes (note the masher not moving!)


while it is sitting, you can juice limes or lemon or just pour some juice into a cup. for about 2/3c of cherries, we used a couple of tablespoons of lime juice. look what a good camera this is! you can see the sugar granules on my hands!


after the 10 minutes, combine the lime juice with a package of pectin and stir to blend.


whisk the pectin/juice mixture into the cherries until thoroughly combined--it will thicken a little, but not all the way


pour into a freezer-safe container, put in the freezer, and you're done!


except! then, you have to eat it!!!

garden-fresh salad!

i'm not sure why this non-recipe is what gets me back to posting, as it is far from the most exciting thing i have made recently--though since saturday's sour cherry freezer jam experiment was well documented, i may post on that also. i think it's just exciting: lettuce from the garden!, strawberries from the farmer's market!, a new and tasty but super-easy tempeh marinade! it's so early summer, and as the weather outside is solidly grey and rainy, i need something to remind me about seasonality.

i made this salad last night, and brought more for lunch today, and it was just the right combo of light and fresh and hearty and flavorful.

first i:
went to the garden and picked lettuce and the last couple of chive blossoms i could find.
this is a picture of chive blossoms

and they are amazing. they will come up again later in the post.

then i:
went to the farmers' market and i got a pint of strawberries even though, as was pointed out to me, we had plenty in the fridge and were getting more in our farm share on tuesday. but the ones in the fridge were from the grocery store, and i didn't want to wait until tuesday.

after that i:
looked around in the fridge and found: 1 pkg tempeh, 1 small spring onion, 1 carrot. i took my chive vinegar that i made in may down from it's lovely spot atop our refrigerator, and got out our nice olive oil (thanks, ocean state job lot!). then i grabbed some apple cider vinegar, ground cumin, a bay leaf, and paula deen's house spice blend (this is just: salt, pepper, garlic, onion).

okay! so now i have my ingredients:

  • lettuce

  • strawberries

  • chive blossoms

  • chive vinegar

  • tempeh

  • carrot

  • spring onion

  • olive oil

  • apple cider vinegar

  • spices (cumin, salt, pepper, garlic, onion, bay leaf)


but you could substitute for almost any of those things. it's just a template!

first, i chopped the tempeh into cubes and marinated it in a mixture of 1 pt olive oil:1 pt cider vinegar, then diluted it to half and half with water. i added the spices, stirred, and put in the tempeh.

next, i sliced the strawberries, chopped half the onion into really tiny pieces, and broke up all the chive blossoms. at this point, it was SO PRETTY:


i got out my mandoline, which is amazing, but you could use a knife, and sliced the carrot really thin. i tossed it into the salad, also.

next, i sauteed the tempeh until it was browned, and let it cool a little bit.

while it was cooling, i washed the lettuce really well. it was quite dirty.

finally, i mixed it all up and tossed in a little bit of the nice olive oil and the chive vinegar.

were i not going to eat leftover blueberry muffin bread with the meal, i might have also made croutons, chopping up old bread (from the freezer) and sauteeing in olive oil with more spice blend (seriously, i don't love garlic or onion powder for most things, but it works really well on croutons) until slightly browned and toasty!

it was SO GOOD. so. good.

will i post more? freezer jam? maybe...

Monday, March 10, 2008

crockpots make ugly but tasty food

this recipe was inspired by fresh from the vegetarian slow-cooker, a book by the amazing robin robertson, who also wrote the vegetarian meat and potatoes cookbook that i LOVE. and vegan planet. and lots of other books.
warning: there is no picture on this entry cos for reals, crockpots make things indiscernible enough that i think my cell phone could not capture anything. but i promise, the appearance is made up for by the genius taste.
to make up for it, here is a picture of a crockpot that looks just like mine. it is two quarts. you can tell it is not mine, though, because it appears to have green peppers in it, which i do not really want to eat.


last night, before i went to bed, i turned on my crockpot to make seitan cacciatore. admittedly, this is probably nothing like chicken cacciatore, but it is really good anyway.
it requires about 10 minutes of non-crockpot prep time, and then many hours of crockpot simmering.
first, i sauteed one package (8 oz) of seitan with a little bit of olive oil until it was browned. as it was sauteeing, i chopped up a small onion, a carrot, and a piece of celery. once it was brown, in like 3-5 minutes, i put it in the crock pot. then i deglazed the pan with some amazing apple cider vinegar--basically putting it in the pan, and scraping up the burnt on bits with the help of the liquid. once it had reduced a little, which was almost immediate, i poured it over the seitan, put some more oil in, and sauteed the vegetables. as they were sauteeing, i put like 1/3 can of diced tomatoes (a big can, so maybe like 8 oz?), a little bit of tomato paste mixed with like 1/2 cup of warm water, some dried oregano, and a couple of bay leaves in the crockpot. i also put in salt and pepper. i did NOT put in a little bit of sugar, but i would do that next time.
once the veggies were done, i put them in the crockpot too. then, i put the lid on, and turned it to low till i woke up. the recipe says 6-8 hours. i definitely was on the longer end of that, since i did all this a while before i went to sleep. in the morning, i took out the pot part of the crock pot and put it in the fridge. when i got home, i had a dinner ready to heat up that i had never eaten before!
i put it with some whole wheat pasta, which was fine, but next time i eat it (maybe for lunch?) i plan to have it with the no-knead bread i am making right now.
edited to add: i ended up eating it with the bread, and tearing up the crust (my least favorite part) to throw into the cacciatore. it absorbed the liquid really well and added a nice taste and texture to the whole thing. it makes me want to bake the leftovers with bread chunks to make a nice stuffing. just a thought.

kale and squash and ravioli and caramelized onions and green onions and...

<0310081207a


so, last night i couldn't decide what to make, so i was looking through the recipes i have bookmarked on my computer, and found this recipe, from one of the most exciting (to me) cooking blogs, 101 cookbooks. so i set out to make it, but my usual inability to follow recipes took over and i ended up with something different.
in my fridge, i had some artichoke ravioli that was going to expire pretty soon, so that became the center of the dish. conveniently, i live right across the street from the (ridiculously expensive, faux cooperative) grocery store, so i could get everything else with very little trouble. i got my favorite green, dinosaur kale.
(isn't it pretty? look at the picture randomly found on the internet!)


i also picked up a smallish butternut squash. it is less exciting than dino kale, so no picture of that. at home, i already had green onions, parmesan, and caramelized onions.


the mention of caramelized onions brings me to a point: recently, i have been really good at, if i know i will be around for a while, caramelizing onions in a crockpot on high for about 5 hours. you can also set them on low for like 10-12 hours, and when you come home from work you will have a bunch of them! basically, i throw some earth balance (but, you can always use butter) in the crock pot, turn it on, and then set to chopping onions. i have a small crock pot, so i can get like two large and one small to medium onion in there at once. i mostly use yellow onions. i throw them in, toss them around so they are all coated with butter, and then let them cook. if i think of it, i stir them once in a while, but it doesn't seem to make much of a difference. i think i mostly do that for myself. once they are really broken down and a consistent mellow brown color, i put them in a ziploc and keep them in the freezer. it saves a huge amount of time later.


after i got home from the store, i realized i had forgotten a lemon. i decided it was not worth dealing with, and that i would cross that bridge when i came to it.
the first thing i did was chop the butternut squash. ever since i got the best peeler in the WORLD, i am willing to peel things because it is shockingly easy. so i peeled the squash, then cut off the neck. i chopped off the end of the neck, and then sliced it into like 1/2" thick-ish slices. then i cubed it. to cut the main part, i basically cut the end off the roundish part, cut what remained in half, scooped out the seeds, and then sliced that up and cubed it, now that it is manageable. cutting my smallish butternut squash, including peeling, took less than 5 minutes this way, which is clearly amazing. i put all the squash into a pan with a little bit of olive oil, on some heat that was probably way too high for it because i am into speed, and then put the water on to boil for the ravioli. every once in a while, i stirred the squash.
next i chopped up an entire kale, just roughly. i had some time, so i snipped the green onions into little pieces with my kitchen scissors (which i feel like is way faster than cutting them. also, let's be honest, by "kitchen scissors" i mean "scissors that i found in the kitchen and washed off," so don't be intimidated.
once the water boiled, i put in a package of ravioli, and a minute or two later the squash was almost brown enough, so i threw in the kale and a small handful of the frozen caramelized onions.
i drained the ravioli when it floated to the top, and threw that in the pan with everything else. i also put in a splash of lemon juice, ground on a little salt and pepper, and shredded some parmesan on it, but that is totally optional. also, i decided it needed crunch, so i put on some sesame seeds (it might have been nice to toast them, but they were an afterthought).
i stirred it and let it heat through. then i ate it, and it was amazing.

Saturday, September 22, 2007

seitan!

ok, y'all, i made seitan today--3 pots of it, for me and e, which will be plenty to last for a month or two (i hope! i do get a little over-zealous with seitan though).
it was ridiculously easy, so i thought i would share with you. this does not mean that i do not want to have seitan-making parties with those of you i have discussed them with! it just means i can tide myself over until they happen.
to make seitan, you need the following:

  • wheat gluten. you can buy this at natural food stores. we got it at the co-op i think.

  • lots of water

  • seasonings! i recommend some combination of the following, plus whatever else you may desire: soy sauce. boullion. vinegar (i used rice vinegar). liquid smoke. thyme. old bay. celery salt. black pepper. sesame oil. poultry seasoning. garlic/powder. onion/powder.

i used my kitchenaid, of course! into the bowl i put almost equal parts water and wheat gluten. what we have established is this: for seitan with more air bubbles, you should use more water and knead for longer. for seitan that is denser, you should put in slightly less water and knead for shorter.
first i used the batter attachment, which is this one:

after that had fully incorporated the two, i attached the bread hook:

i let that go for about five minutes. this made the seitan denser--so, as mentioned, knead for longer if you want it more airy.
the aforementioned steps can all be done by hand. but, if you do them with the mixer, then you can spend the time they are kneading making your broth.
basically, to make the broth, i fill up a pot (or three) with water, about 6" high because you want it to cover the seitan as it cooks. then, i put in enough boullion to add substantial flavor--a little more than whatever the package tells you, because this is what is going to flavor the base of your seitan. i think that a salt-free or low-salt boullion is best, because you are going to put in soy sauce/braggs also and you don't want to overwhelm the flavor. after the boullion, i put in the soy sauce, and whatever else i want. i think that liquid smoke is super important to the taste of the seitan, but remember that a little goes a long way. you do want the broth to be strong, though. honestly, it's pretty hard to fuck up.
i bring the broth to a boil, and once the seitan is done cooking i cut it up into small pieces. the smaller they are, the faster they cook, so i make them maybe about 2 cubic inches (like 1"x1"x2" or so). once the liquid is boiled, i drop the chunks in, and then i go play a game or do something else for about an hour so i don't stare at them, but i stir them every 10-15 minutes to make sure they don't burn to the bottom. if it looks like they are running out of water, pour in some more, with a little boullion if you want.
then, after about an hour, they should feel sort of like the seitan you get from the store! i like to drain them and then cut them up and put them in freezer bags (no liquid needed) so that they are ready to use whenevs.
soon, i am going to make fried seitan with biscuits and broccoli. that might be more like a 30 minute meal, but so worth it! i will post when i do.

Sunday, September 16, 2007

a quick note

in re-reading my blog, i realize that it looks like i overuse the word "threw" in a shorthand way for saying "put." that is not true. i am very dramatic and therefore literally do throw things into pots and bowls when i cook. i just wanted to be clear about that.